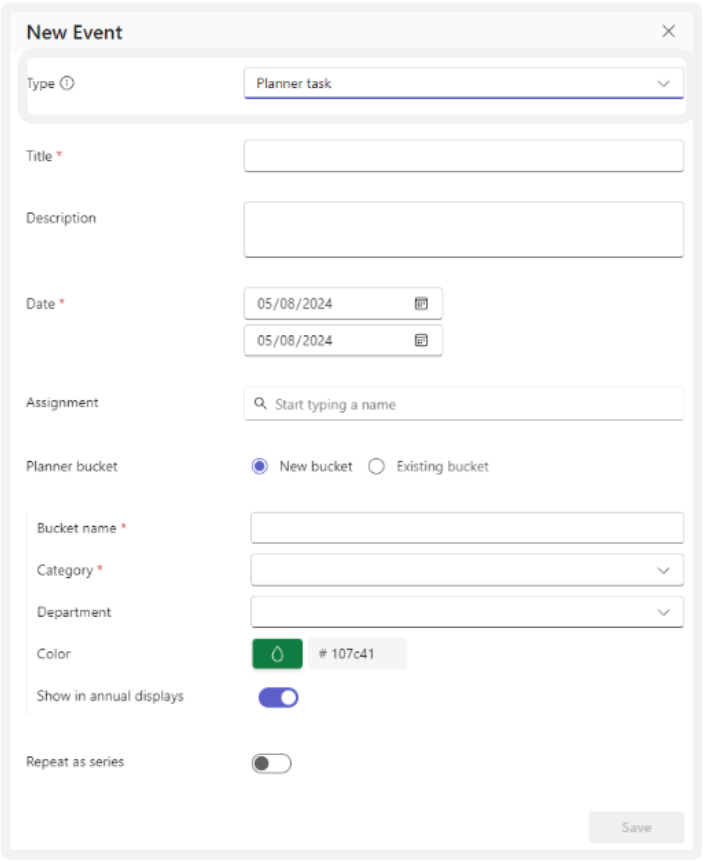
Click the “Create” button and select “Planner Task” in the “Type” field.
Fill in the “Title” and “Description” fields.
Set the start and end Date.
Assign the task to one or more people.
Choose whether to create a new bucket in Planner or use an existing bucket.
If “New Bucket”:
Enter the Name of the bucket.
Specify the Category and, if applicable, a custom filter category (if this has been set up).
Choose the desired Color to represent this bucket.
Decide whether the event should be displayed in the Year View or not (shown by default).
If “Existing Bucket”:
Select a bucket from the dropdown list. This will show buckets from the associated plan, as specified in Settings in PlanIt.
Set the Frequency. If you specify that this should be recurring, also set an End Date for the series. See Repeat as series for an explanation.
Finish by clicking “Save”.
The activity is saved and becomes visible to all users. Additionally, a task will be created in Planner linked to the activity. If a responsible person was assigned, they will also receive a notification.
Note! To create planning activities with reminders, you must have Planner activated in the relevant team. See the separate guide on Setting up PlanIt for more information.